Sunday, May 2, 2010

VT Quilt

It is finally finished!  

For those of you that don't know, Virginia Tech Hokie fans are CRAZY DEDICATED to their cause...promoting and cheering on the Hokies.  I have NEVER IN MY LIFE seen a town so decked out in its local university's colors...even the TCBY (yum!) here is painted maroon and orange on the inside.  I have seen multiple maroon cars that have orange accent stripes along the sides, some even with a hokie bird somewhere along the line.  So I was not surprised to find someone that wanted a Hokie quilt.

About 2 months ago I saw this ad on craigslist from a girl that was looking for someone to make a Virginia Tech  themed quilt for her.  I decided to tackle the project.  2 months later...and a lot of tears shed (over my broken machine...sad)...I am D.O.N.E!!!
Here is the back for those quilters in the house that might be interested.  (Framing the square in the center was actually my husband's idea...kinda embarassed I didn't think of it myself.)
The client is a HUGE hokie fan; she also likes hearts a lot, so we combined the two into the design...not exactly what I would go for, but if it works for her that is all that matters.

Here is the center of the quilt detailing.
Here is one of the hearts that run along the top and bottom of the quilt.  I had never done too much machine applique...only like the second time I had ever used a satin stitch, but love the look of it.  I used coffee filters that I had ironed out to help keep the fabrics from shifting.  (Sorry, I can't remember what site I got that idea from.)
Here it is all folded up ready to go to its new home!

Saturday, April 24, 2010

Quilted Notecards

I saw this QUILTED NOTECARDS tutorial on MADE and couldn't resist...I MADE some (hahaha, I am so funny) immediately.

Here are some of mine...
I thought it would be fun to cut around the flower on the fabric to add a little character to this card.  So many possibilities...

I absolutely LOVE ruffles AND polka dots!

Can you tell this one was my favorite?  I made three of this one.

Now I just need a reason to send out some cards.

Friday, April 23, 2010

Ribbon Dancer...Totally having flashbacks...

Avery, my 2 year old daughter, is very much into swinging and banging things lately.  She likes to swing beads; she especially likes to swing them around her defenseless brother.  I decided to remedy the situation by making her a RIBBON DANCER, a toy she is allowed to swing around, that will hurt Carter less if she happens to get too close.

Materials:
12-14 inches of 3/8 wooden dowel
handsaw
small piece of sandpaper, a scrap even
painters tape
acrylic paint
sponge brush
spray acrylic sealer
thumb tack
8 inches yarn or string
about 3 feet ribbon (I think I used 1.5 or 2 inch, sorry I don't remember)

How to:

Step 1: Use the handsaw to cut off the length of dowel rod you need.  I think they usually come in 36 lengths if I remember....that seemed a little too dangerous for Avery's arm to me.  Sand the end or ends you saw because they will be a little rough.  (We don't want splinters, that'll turn playtime into a painful screaming fest quickly.)
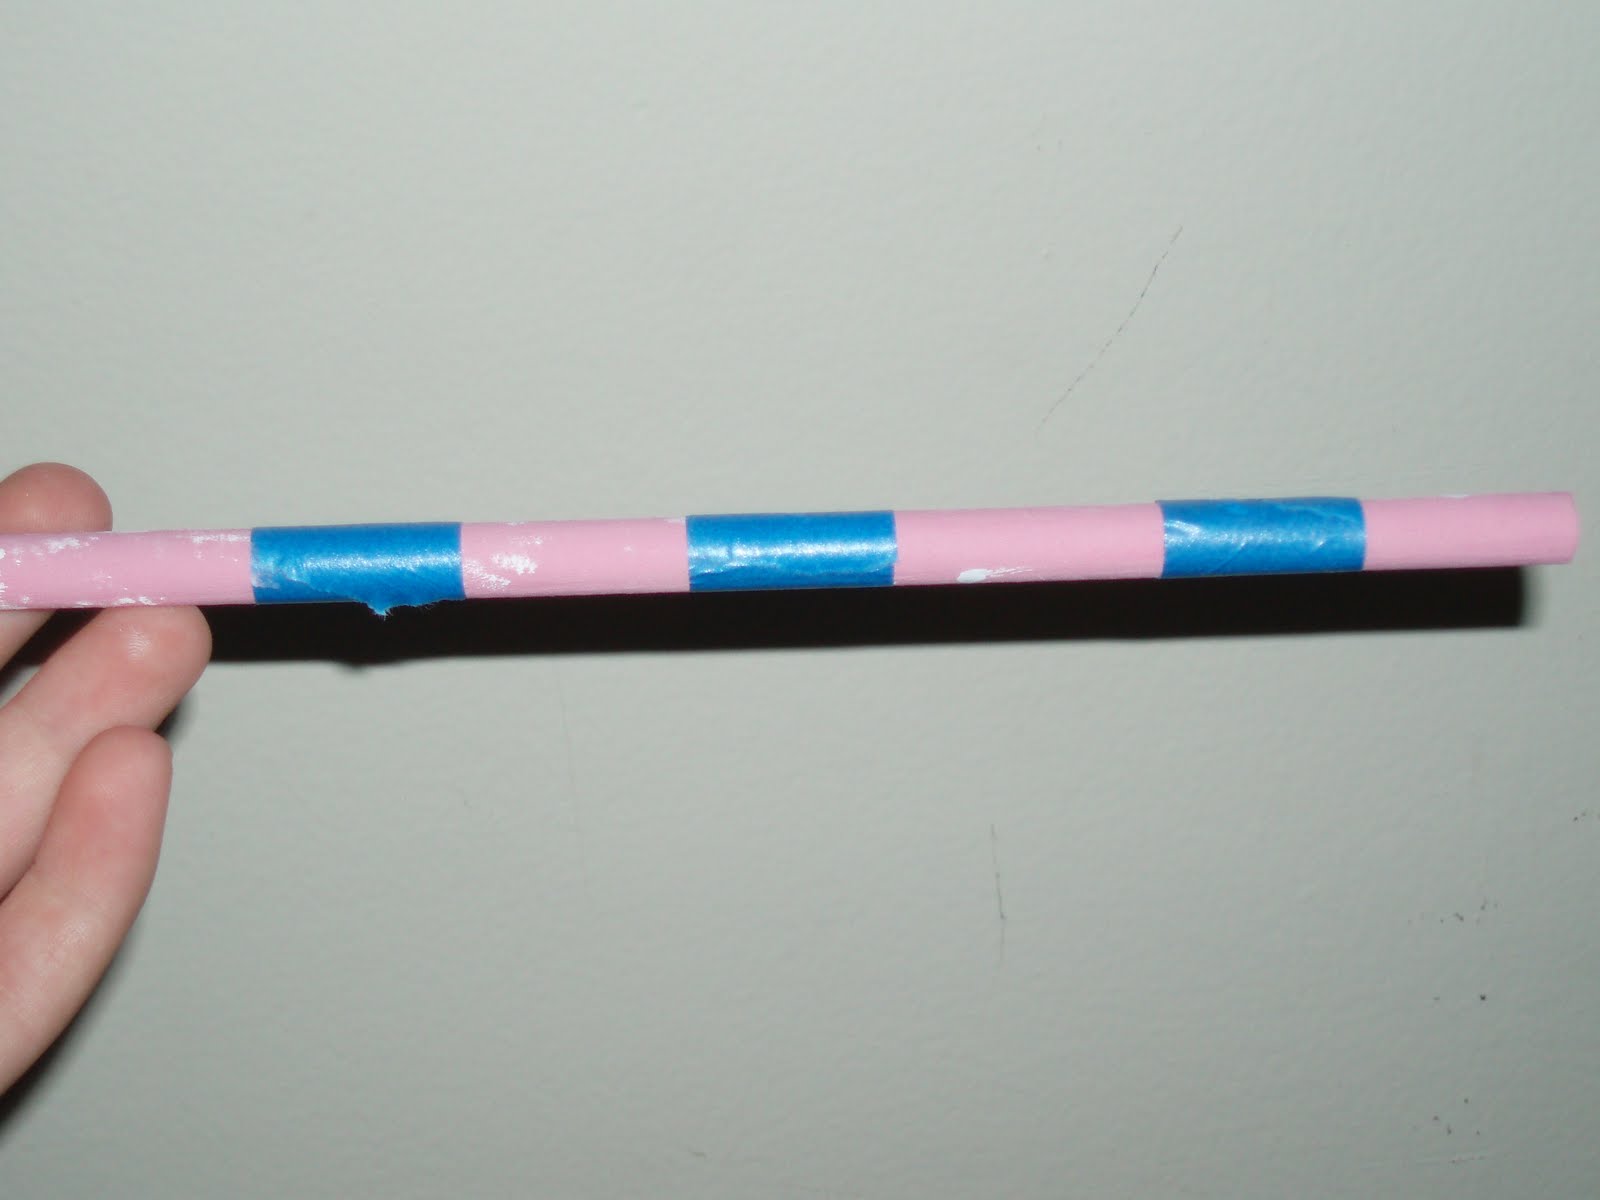
Step 2: Paint your dowel rod your chosen color.  (I did pink because I already had some pink ribbon...orange or some bright turquoise would look GREAT.)  I applied to layers of paint.  Allow to dry in between.  If you want a solid colored rod you can skip the next step.
Step 3: Apply painter's tape to the areas that you do NOT want to be your secondary color.  (If you look close you can see the white spots where my 2 year old "helped" me with some painting while I wasn't looking.)  Paint secondary color on.  I did 2 or 3 layers here because my secondary color was lighter than my primary.  If I was thinking straight I would have switched the order of application of my colors.
Step 4: Fold over and sew down the edges of the ribbon.  I allowed a larger hem on one end for slipping a piece of yarn through for attaching to the stick.
Step 5: Slip yarn through slot and tie a knot at the end of the yarn, tying the two edges of yarn into the same knot that is.  Attach the yarn/ribbon to the dowel rod by putting a tack through the knot into the dowel rod.

VOILA!!!  RIBBON DANCER...tons of fun.
And, for some live action shots...


 PS - As a side note, I remember one specific Christmas when my cousins got ribbon dancers and I was a totally jealous 7 or 8 year old.

Saturday, March 27, 2010

Dishtowel Bibs and Hemp Ball Decorations

So, amidst the quilting of the the last couple of weeks, and sick kiddos, I have found time to craft still and am finally doing some posting.  (I am STILL waiting to do my headboard, got the door and all, but having trouble finding access to a table saw; so, sadly, that one will have to wait for now.)

I have TWO, that's right, TWO recent projects to post today.  So, without further adieu, on to the first one.

Dishtowel Bibs
Now that Carter is eating solids multiple times a day we go through bibs like they are nobody's business.  We seem to be completely out of clean ones every couple of days, especially since Avery decides she needs one too if she eats at the same time as Carter.  Since we have a plethora of dishtowels (I have NO idea how that happened), to the point of them being annoying I decided to turn a dishtowel into a bib.  Plus, that way Carter doesn't have to wear girly bibs like this one...
You can't see it well in the picture, but the ribbing around the neck of this one is pale pink.  My husband, who, incidentally is sitting right next to me as I type this, would probably kill me for posting a picture of his little man with a bib that has pink on it on the worldwide web.

Anyway, onto the project!

Materials:
1 dishtowel
1 bib (to use as a pattern)
fat quarter or scrap fabric to match

How to:
Step 1: Make your pattern.  I only made a half pattern to insure it would be symmetrical and cut my pattern on the fold.  Sorry I don't have pictures of this, but it is easy.  Simply fold the bib you have in half, trace, and cut.  (Make sure you can get 2 cuts of your pattern out of your dishtowel unless you plan on having the front and back cut from different towels.)  Then, cut the two pieces.  You should end up with something like this.  
You could cut just one I suppose; I wanted mine to be thicker to prevent soaking through too much and because I am doing an applique on mine and didn't want the back side to show it.
(If you want to do an applique, now is the time to do it.  Here is a good tutorial on how to machine applique.)
After applying your applique and securing it with stitching you are ready to go on.
Step 2:  Now, cut your bias strips for the edging.  I cut my strips of fabric on the bias to allow for the most stretch as possible.  (This is a good idea because you will be working around curves.)  You can buy a package of double fold bias tape or make your own.  I made my own because I wanted the pattern to match my initial applique.  Cut your strips between 2.5-3.0 inches.  Sew your strips together until the whole strip is long enough to go all of the way around your bib.
Step 3: Iron the strip in half so that the pattern side is on the outside.  Sew the pattern pieces and newly created bias tape all together as shown in the pictures.  (You will need lots of pins around the curves.)  If you aren't using a button apply your velcro now to allow for the fewest number of seams.  Apply one side of the velcro to the front of one flap and the other side of velcro to the back side of the other flap or it won't work properly.
Make sure that you make your seam just under 1/3 of the width, this allows enough to fold over and to the back of the bib so that you will only have one seam showing on the outside, the bottom being caught up in the seam when the top is stitched.
It is seamed all of the way through the top of the bias tape, the two layers of pattern pieces and the bottom of the bias tape.
Now, you are done.  Put it on the kiddo and let him get messy, or let him just eat the bib, that works too.

Hemp Ball Decorations
I got this cute idea from Ashley at Make it and Love it.  Here is her tutorial.  I figured there was no reason for me to make one when she already has a great one.

Tuesday, March 23, 2010

Decorative Dots

I found these wooden dots at the Thrift Store (where I get a lot of supplies lately due to the monthly budget changes) for 49 cents each.  I decided to use them to decorate the kids' room.
Materials:
Wooden dots
Fabric
Coordinating Paint
sponge brush
Mod Podge

How to:
Step 1: Cut the fabric to be slightly larger (about 1/2) than the wooden dots.  (Note the red paint.  You do not need to paint them first; the ones I bought had been previously painted.)

Step 2: Apply Mod Podge using your sponge brush to the front side of the dot, stretching your fabric out evenly.   Flip the dot over and apply Mod Podge to the edges of the back.

Step 3: Fold the fabric over the back of the dot.  I sponged a little extra Mod Podge over the top of the fabric to hold it better and prevent fraying.  Allow to dry completely.

I painted the black ones with black acrylic paint.  Be careful to make it smooth and make your strokes in the same direction if you use acrylic paint.  I would actually suggest using spray paint instead if you have it around.  I didn't have any around and I had a HUGE bottle of black acrylic paint for some reason...

Another shot of the dots in the room.
PS - Just as a side note, apparently Mod Podge doesn't stick to styrofoam I found out during a project recently.  So, if you plan on using Styrofoam shapes use craft glue or a low temp glue gun instead.

Monday, March 8, 2010

Quilts, Work, and Things

Several reasons for my absence over the last week.  
1. I have been working on getting a part-time job.  (I have a BS in Dental Hygiene, and since we are students, we need a little more money.)
2. I am making a quilt right now.  A girl on craigslist was looking for someone to make a Virginia Tech quilt for her.  Haha, I am getting PAID to quilt.  HOW AWESOME IS THAT?  It doesn't come out to much an hour, but I am getting paid to craft.  SWEET...that's all I have to say about that.  Will post pics when it is done.

Don't sweat it though.  I have something BIG coming.  I am super excited about it, but figure it will take me a week to do probably.  I am making a headboard for my bed.  Materials?  I got an interior door from the thrift store for, hold you breath, $1.  Awesome?  I KNOW!  The question is, what color do I paint it after I sand it down?  Our bedding is cream and maroon.  We also have a spread that is maroon, green, and marigold.  What do yall think?

Thursday, February 25, 2010

Colorful Burp Cloths

When I had my first child a few years ago, my cousin sent me some cute burp cloths that my aunt made.  They looked easy enough so I decided to make some myself.  Well, ever since, I have made them and given them away as gifts at baby showers and whatnot.
You can get several out of just one fat quarter.  Above you can see a selection of boy/gender neutrals that I have made.  I like bright colors, can you tell?

Materials:
1 package of ric-rac
1 fat quarter
burp cloth (old school cloth diapers)
coordinating thread

How to:
Step 1: Measure your burp cloth.  I usually cover the thick part in the middle with the fabric.  I cut mine
1/2-1 longer and wider than the area I need to cover to allow for folding underneath.  Fold under and iron.
Step 2: Pin the cloth and ric-rac to the burp cloth.  See how I have the ric-rac half underneath the cloth?  
Step 3: Sew along the edges as close to the edge of the fabric as possible.
Cute, huh?  Now I just need a friend, or family member (Hint, Hint:  I wouldn't mind being an aunt again) to have a little linebacker for me to send this one to.
PS - You can also use ribbon instead of ric-rac...in this case I don't iron under and simply pin the ribbon to the top of the cloth.  I do sew around the cloth twice though, once on each side of the ribbon as close as I can get to the edge.